Showing posts with label know-how. Show all posts

Saturday, 24 September 2011

Video: Kimono & Obi Dressing in 5 Minutes

I'm getting a little bored of the closet features and book scans already hahaha.

I found this video years ago, and was just amazed at how fast this woman can dress a mannequin in kimono and obi - and so neatly too! I've been aspiring to be able to dress as quickly and neatly :)

My favourite part about this video is that the woman demonstrates a particular obi musubi that I've found particularly difficult - tsunodashi musubi. It's a very casual musubi that should only be worn with komon (I think of it as one step down from otaiko but one step up from hanhaba) but I really like how it looks with vintage kimono and obi.

Enjoy! :)


Wednesday, 21 September 2011

Kimono Know-How: Furisode Musubi, pg 44-45 from Furisode Daisuki! 2006 - 2007

Following last week's post on three-section himo with elastic bands, today's post is on two of the pages in Furisode Daisuki! 2006 - 2007 that features obi musubi for furisode using them. (Pages 44 to 45, to be exact)

These pages are featuring variations of the popular tateya musubi. My favourite musubi is the one on the top left, with the orange furisode and teal obi!

Magazine: Furisode Daisuki 2006-2007
(Click here for a larger image!)

Source:
Magazine: Furisode Daisuki 2006-2007
振袖大好き!2006-2007
Furisode Daisuki! 2006-2007
I Love Furisode! 2006-2007
ISBN4-418-05141-4


Sunday, 4 September 2011

Video: How To Dress Yukata & Kimono Part 2

Hmmmm..... It seems that after posting part 1 of Ichiroya's YouTube video on how to dress in yukata, I'd completely forgotten about posting part 2! How embarrassing!! =^__^="""

Anyway, here is part 2 to Ichiroya's instructions on wearing yukata:

(Best part: the video is in easy-to-understand English!)


(Click here for my post on part 1)


As mentioned in my part 1 post, Ichiroya's video is one of the best I've seen, with clear and easy instructions at a decent pace. I love that they show many small but important things, such as a complete list of items needed to wear kimono, padding and the proper kimono silhouette, and important tips to keep in mind when wearing kimono.

Absolutely great video for beginners :)


Tuesday, 30 August 2011

Kimono Know-How: Fancy Obijime Ties from Furisode Daisuki! 2006 - 2007

Following Saturday's kimono know-how post, I figured it'd be nice to match the fancy obiage knots with some fancy obijime knots.

So here is the page from the same magazine on tying obijime for furisode.

Magazine: Furisode Daisuki 2006-2007
(Click here for a larger image!)

Source:
Magazine: Furisode Daisuki 2006-2007
振袖大好き!2006-2007
Furisode Daisuki! 2006-2007
I Love Furisode! 2006-2007
ISBN4-418-05141-4


On a separate note, Selamat Hari Raya to all my Muslim readers! For my Malaysian and Indonesian non-Muslim readers, Happy Holidays! :) I'm certainly looking forward to this long break haha!

Ta~


Saturday, 27 August 2011

Kimono Know-How: Fancy Obiage Ties from Furisode Daisuki! 2006 - 2007

Just thought I'd share a picture of one of my older furisode magazines on how to tie your obiage in nice fancy ways.

Magazine: Furisode Daisuki 2006-2007
(Click here for a larger image!)

Source:
Magazine: Furisode Daisuki 2006-2007
振袖大好き!2006-2007
Furisode Daisuki! 2006-2007
I Love Furisode! 2006-2007
ISBN4-418-05141-4


Friday, 3 September 2010

Style Tips: September

One of the lolita blogs that I follow does an article on style tips for each month. It's a pretty fun idea, so I thought I'd start doing it too, only for kimono ^_^

Please note that most of these tips are completely from my own opinions and small bits of knowledge I've picked up or noticed over the years I've been into kimono. As such, they shouldn't be taken as any sort of steadfast rule, but instead as guidelines on how to dress in tune with your surroundings.

Also, most of my style tips are applicable for the Northern Hemisphere only - maybe even specific to London, which is where I gained all my personal knowledge about kimono in cold weather! However, if you're able to withstand the heat, these may also apply to those in tropical countries as well. ♥

Here goes!

  1. Start preparing for the upcoming cold weather early: air out your warmer kimono ahead of time so that if there is a sudden drop in temperature, you're not caught without anything to wear!
  2. Things might start to get a little chilly later this month so switch out your yukata and summerweave kimono for a warmer hitoe when you begin to feel that nip in the air.
  3. If you find it too cool for summerweave fabrics yet too warm for hitoe, compromise by wearing a ro juban under your hitoe kimono. Alternatively, layer up a little with a lace haori or shawl.
  4. As a precursor to colder weather ahead, your han'eri, obi, obiage and obijime (and even tabi and zori!) should no longer be usumono.
  5. At night, temperatures can dip pretty low, so keep a thin pretty shawl in your bag when you go out.
  6. This month marks the beginning of autumn, so slowly phase out your summer colours of blues and purples, and start introducing small amounts of orange, yellow, brown and red to your ensembles.
  7. Autumn's most common seasonal motifs are chrysanthemum flowers and turning maple leaves, which are worn throughout September, October and November.
  8. The Japanese usually decorate their house with pampas grass around this time of the year (tradition dictates that this will ward off illness for the year) so wear pampas grass motifs earlier in the month to keep in season.
  9. Other in-season motifs to keep in mind: Bush clover, Chinese bellflower, crickets, dragonflies.
  10. September's moon in considered to be the most beautiful of the year. Until/On Tsukimi (the moon-viewing festival) which is on 22nd September and 20th October this year, wear kimono and obi with moon motifs.


Thursday, 21 May 2009

Kimono Know-How: Obi Musubi - Bunko Musubi With Nagoya Obi

Quite a while ago, I'd taken pictures of some of the pages of one of my obi tying instruction books. I uploaded them onto Flickr and shared them on the IG forums, and now I've decided to post them here too. ^__^ No excuses on why I didn't do this earlier. I was simply lazy.

Today, I'm going to share one of the twelve bows (from now on referred to as "musubi", which means "tie") they show in the book. We're always talking about tying a bunko musubi with a nagoya obi, and I found the instructions in this book. It's easy enough to guess on its own, but it's still nice to have instructions anyway :)

Here are details of the book!


Book title:
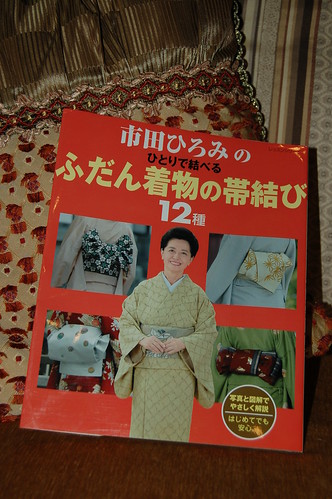
市田ひろみのひとりで結べるふだん着物の帯結び
(Ichida Hiromi no hitori de musuberu fudan kimono no obi musubi)
Ichida Hiromi's You-Can-Do-It-Yourself Obi Tying Styles for Everyday Kimono

ISBN: 978-4-86322-003-4

(By the way, sorry for the bad pics, but these were originally for my own reference only, so I hadn't cared about how they turned out!)

These pictures read from right to left.

The instructions I type here are not translations, but rather my own instructions deduced from the pictures and a rough translation of the book.

You may click on the photos to be sent to my Flickr page, where there are larger and clearer photos of the pages.
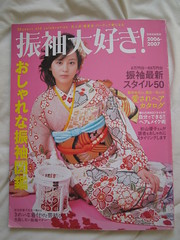

The book cover:
Fudan Kimono Book


Page 1
Bunko Musubi with Nagoya Obi 1

Right page: 
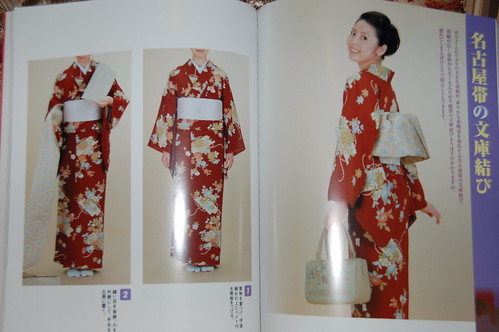
How a bunko musubi tied with a nagoya obi is meant to look like from the back.

Left page:
1) Once you have worn your kimono, put your obi ita on.

2) Hold the end of the "te" part over your left shoulder, and bring the obi around your back to the front of your right side.


Page 2
Bunko Musubi with Nagoya Obi 2

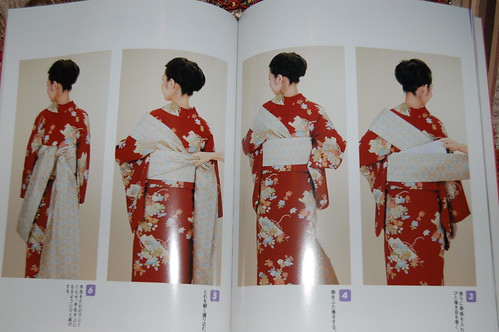
3) Wrap the obi around your front, and bring it to the back again. When bringing it to the right once again, put in an obi ita on the back.

4) Wrap the obi around your front a second time.

5) When the obi comes around in the back, make a fold to narrow down that part of the obi (referred to as the "tare" part).

6) Bring down the "te" part from your left shoulder, and use it to tie a knot with the "tare" part.


Page 3
Bunko Musubi with Nagoya Obi 3

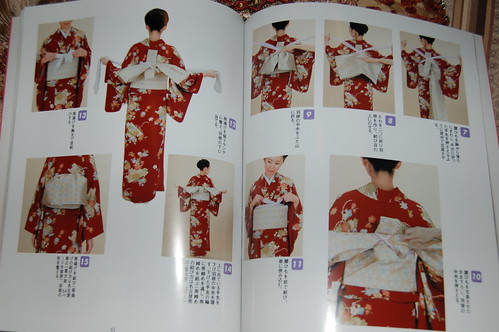
7) Take a himo and wrap it around your body once, so the ends meet at the back and the center of the himo is in your front. Cross the ends over the "te" part to make an X shape on your back, and hold it tight against your body.

8) Open up the "tare" part, and fold it to make it a perfectly centered rectangular shape against the body.

9) In the middle of the "tare" rectangle, create folds to make it into a bow, and hold the center of the bow against the "te" part.

10) Using the himo in part 7, bring the himo down over the center of the bow to make an X tightly over the bow. This will keep it in place.

11) Tie the himo in the front, and tuck it into the obi.

12) Place your obiage at the top of the "tare" bow, between the "te" and the "tare" bow.

13) Roughly tie it in the front. You can adjust this later to make it look nicer.

14) Bring the "te" part down, and use your obijime to secure it. Tie the obijime in the front.

15) Bring the folds of the bow down to make it look like a bunko. Adjust the obiage in front.


Page 4
Bunko Musubi with Nagoya Obi 4

Finished! The last thing to do is to check that everything's in order: The point of the "V" on the neckline must line up in the center with the obiage knot and obijime knot. The center of the bunko bow must also line up to the center seam of the upper part of your kimono.


It seems easy enough, but note that this one takes two people rather than one person! I have tried to do this on my own before, but it doesn't turn out as prettily as when I'm tying it onto my mannequin. Maybe I should practice more....

I hope this helps some of you ^__^